


| Troubleshooting | |
| 360 adjustment ring - "dead" spot? | |
Inside the adjustment system, the bolt that presses the button to release the cylinder isn't out far enough. This can be adjusted by popping off top and adjusting the bolt just a bit. Not too much because it will then trigger the adjustment when one sits on it. The fit of the cylinder to the rest of the chair is a pressure fit. To remove the cylinder from the seat:
Inside the hole where the cylinder was inserted, there is a 10mm bolt.
|
|
| How to Remove a Cylinder | |
Step 1: Turn the chair or stool upside down where the base of the chair with the wheels is facing the ceiling.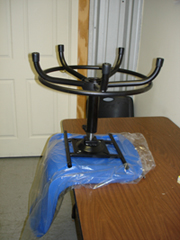 Step 2: Grab the cylinder with one hand and hold it so the chair is slightly raised off of the table or floor. Then using a rubber mallet, hit the seat of the chair and/or the control of the chair. Do not worry about hitting it too hard; you will not hurt the chair. If needed, spray a little lubricant like WD-40 in the crack where the cylinder meets the seat. 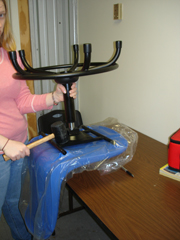 Step 3: Once the seat is removed from the cylinder, turn the base back over to where the wheels are facing the floor. Then, grasp the cylinder in one hand and hold the base slightly off of the table or floor and hit the legs of the base to release the pressure fit. Again, if needed, spray a little lubricant in the crack where the cylinder meets the base. This may take more effort depending on how long the chair has been in use. Step 4: To replace the cylinder, place the replacement cylinder in the base and the seat on top of the cylinder, then sit on the chair carefully to engage the pressure fit. 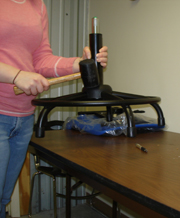
Click HERE to save the instructions on How to Remove a Cylinder onto your computer. |
|
| Replacing Casters or Glides | |
| Put the chair/stool on its side. Pull the old caster or glide out and pop the new one in. Repeat. No tools required. | |
| Stool height will not adjust at all. | |
| On
the top of the cylinder there is a little green button that when
pressed, releases the cylinder so it can be adjusted up and down. There
is a bolt in the underside of the seat in the adjustment mechanism that
is NOT PRESSING THE BUTTON IN so it isn't releasing the cylinder for
height adjustment. So... 1. Carefully remove the cylinder from
the underside of the seat. When assembled, the cylinder is pressure
fit into the adjustment control so it may take some "elbow grease" to
remove it from the top. Put the cylinder back into the underside of the seat. Test and repeat if necessary. |
|